





KNOWLEDGE // WEBINARS

Mastering Metal: Key Insights for Field-Applied Architectural Coatings

Joseph Buccini, Associate Principal
Kelly Cronin, Associate Principal
Rebecca D. Wong, Senior Associate
58:39
 

For building enclosures, metal elements rely on protective coatings—not just for durability but also for aesthetics. These coatings are the first line of defense against environmental exposure, wear and tear, and human impact. Over time, even the best coatings require maintenance. The longevity of a structure often hinges on how well these coatings are selected, applied, and preserved.

In this webinar, architect Joe Buccini, engineer Kelly Cronin, and architectural conservator Becky Wong explore the critical role of coatings on metal substrates, specifically metals that are architectural/non-structural. Learn how to assess coating performance, identify signs of damage or distress, and evaluate repair strategies. The presentation covers key considerations for overcoating and recoating, offering practical guidance for design and installation to ensure long-term success in the field.

By the end of the webinar, you will be able to:

  • Explain the importance of coatings on metal substrates
  • Recognize potential coating issues
  • Identify different approaches to coating repairs
  • Describe the overall importance of coating selection
 
more to learn

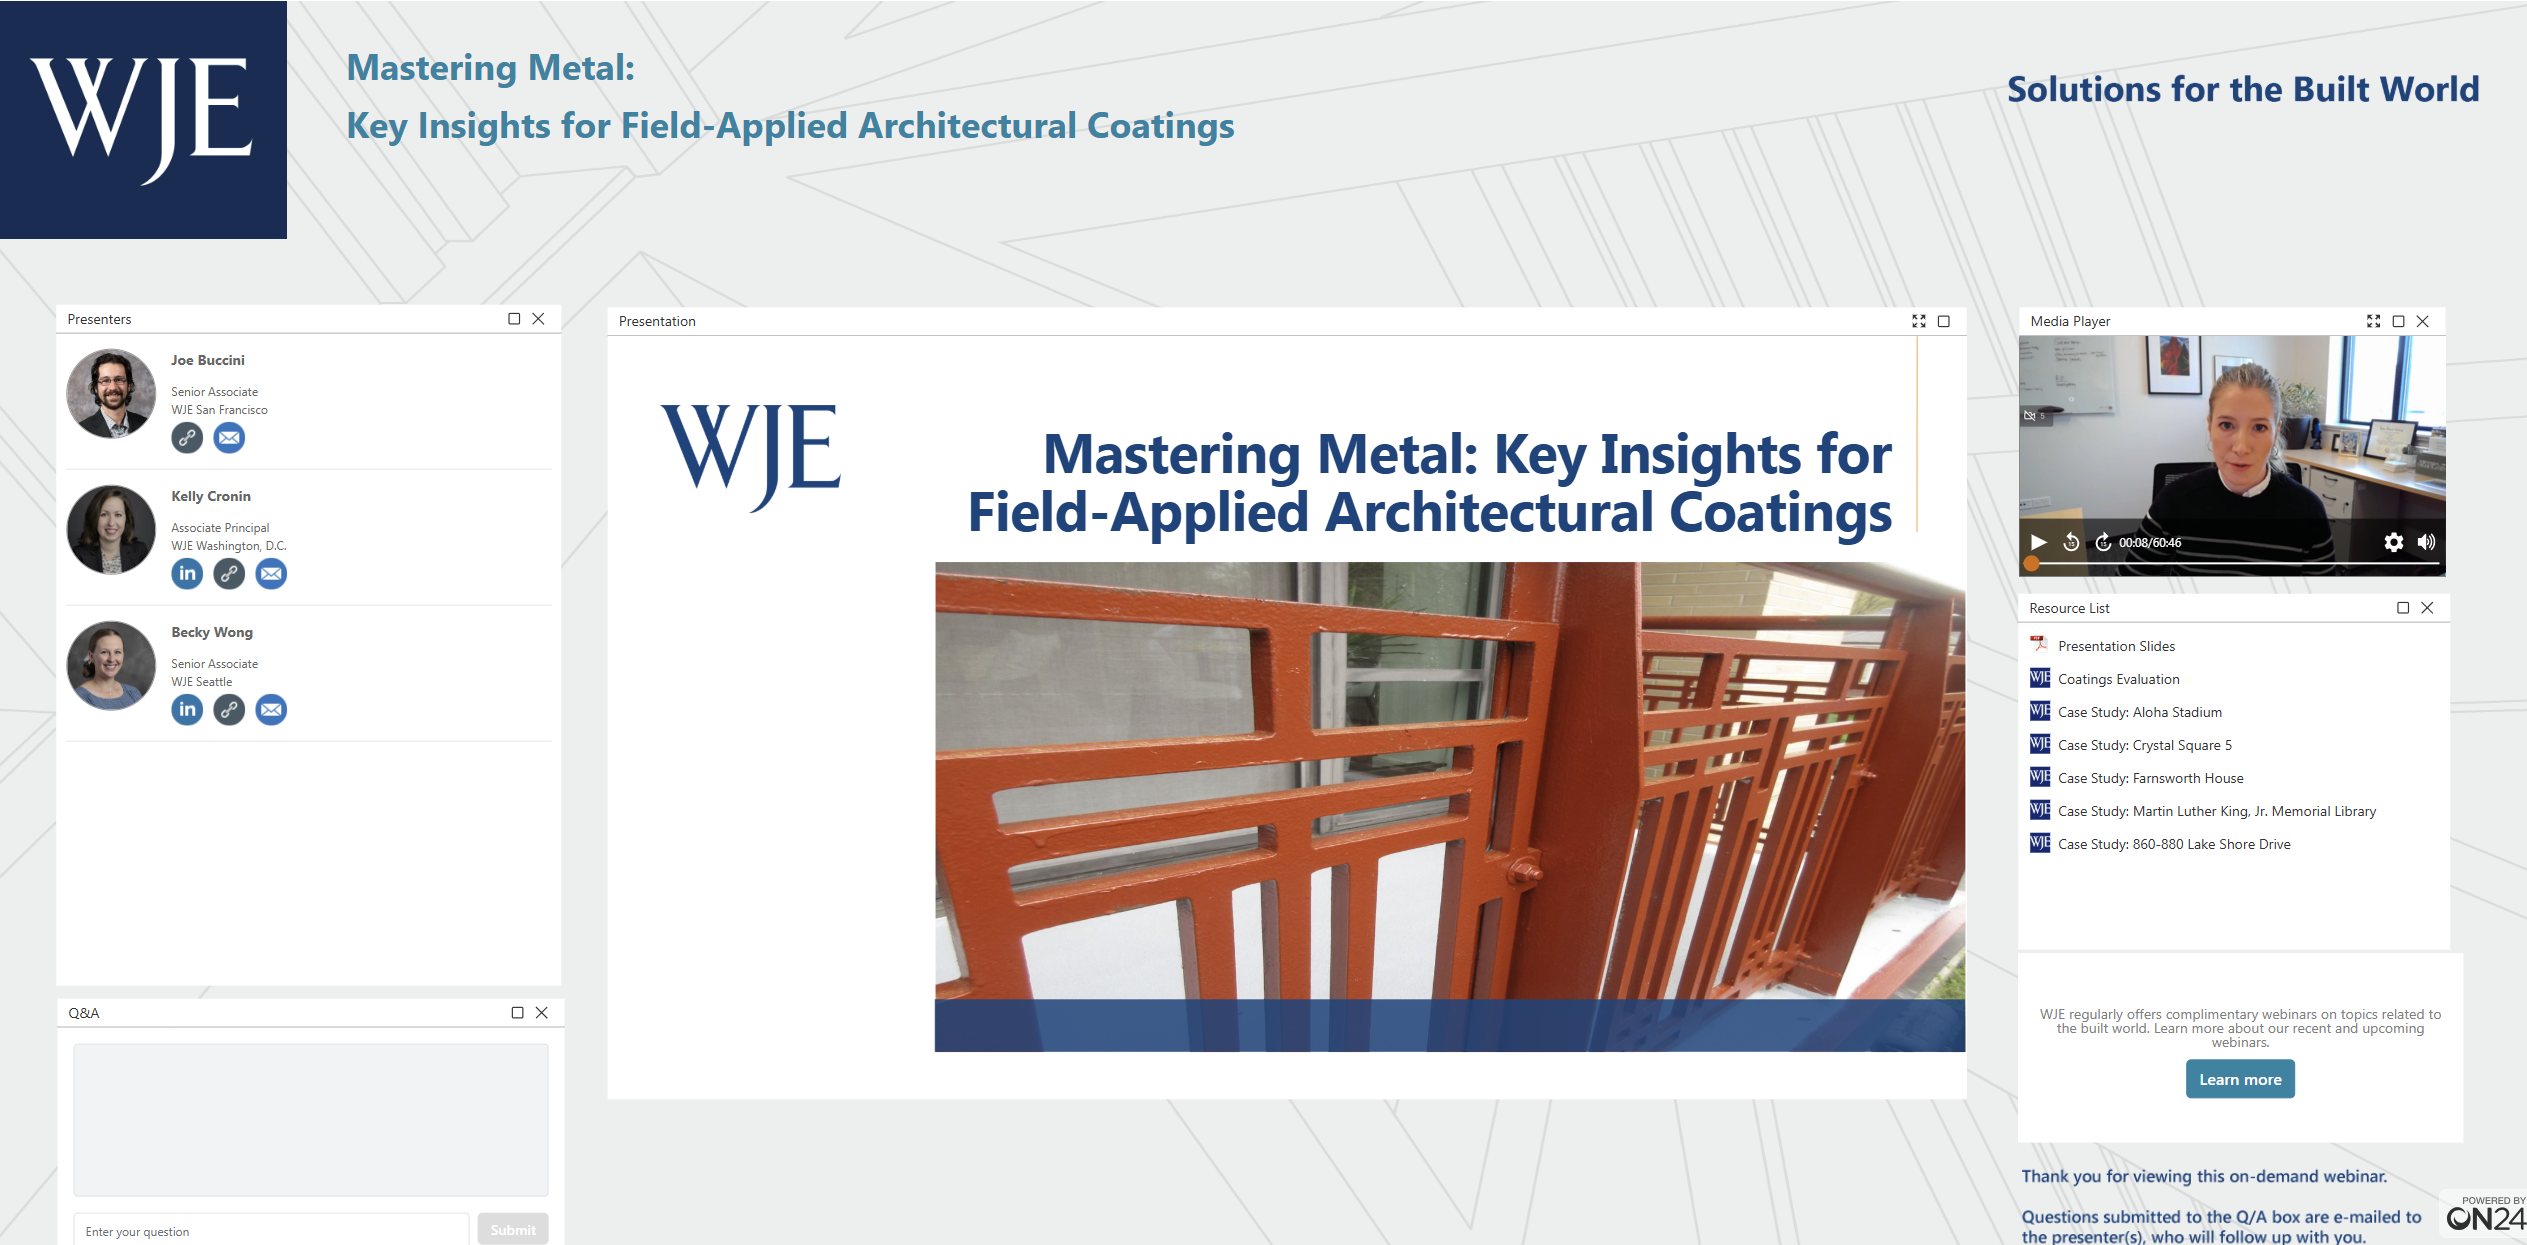
View this webinar in our interactive audience console to earn 1 AIA learning unit, access related resources, submit questions to the presenters, and download a certificate of completion.
 

View Transcript
WJE Webinars
Mastering Metal: Key Insights for Field-Applied Architectural Coatings
Joseph Buccini, Associate Principal
Kelly Cronin, Associate Principal
Rebecca D. Wong, Senior Associate
Liz Pimper

Hello and welcome to today's WJE Webinar Mastering Metal Key Insights for Field Applied Architectural Coatings. My name is Liz Pimper and I'll be your moderator. During the next hour, architect Joe Buccini, engineer Kelly Cronin and architectural conservator, Becky Wong will explore the critical role of coatings on metal substrates, specifically metals that are architectural or non-structural. This presentation is copyrighted by Wiss Janney Elstner Associates, and now I will turn it over to Becky to get us started. Becky,

Becky Wong

Excellent. Thanks so much, Liz. Thank you for everyone who's here with us today. We're excited to talk about this topic and I hope you get an insight of some of our passion. So our learning objectives, which you guys have probably seen, but real quick, we're going to make sure that by the end of this presentation you're able to explain the importance of coatings on metal substrates. You'll be able to recognize potential coating issues and you'll be able to recall different approaches to coating repairs. And then lastly, describe the overall importance of coating selection. As such, this is how we have our presentation outlined for today. As you'll see, it's sort of going through the project lifecycle of a coating project, and really our goal is for you to be armed with information to recognize the need for coatings or re coatings, be knowledgeable with key elements during surface preparation and coating selection, and to be able to anticipate future maintenance requirements based on the coating system selected.

So let's jump into it. So we're going to talk about why coatings are applied, how they're applied, where they're applied, and how they're kind of just the whole how, when, where, and why. So for purposes of this presentation, we will be focusing on steel and aluminum. Discussion of steel will also apply to rot and cast iron. We also want to recognize that copper alloys such as bronze and brass can be coated, but most often this is done by chemical means. If anyone has specific questions on these metals, we would be happy to answer questions at the end of the presentation. Coatings for metal can also be applied in the shop as well as in the field shop. Applied coatings offer many benefits of being able to use coating types that are not possible in the field, such as baked on coatings along with having the ability of a more controlled environment. However, for today's presentation we'll be talking about field applied coatings, which can be very tricky in typical in situ conditions.

So why are coatings used, so ferrous metals in particular require a coating to perform to reduce the risk of corrosion. Corrosion occurs when an iron containing component is exposed to corrosive environment, which includes air, water, and even certain chemicals. And essentially corrosion is the natural deterioration of a metal, A material, usually a metal that results from chemical or electrochemical reaction with its environment. Corrosion is essentially the steel wanting to return back to iron oxide. Ferrous metal corrosion has a brownish red or even orange appearance. Corrosion can take many forms, but over time corrosion can lead to the loss of metal and risks long-term performance. So as you can see in this photograph here, this is a handrail that's exposed to a very severe marine environment and over time, as shown with the yellow arrow, it has formed corrosion and in this instance what we call lamellar corrosion and that's the formation of corrosion. That's in parallel layers to the grains. Very expansive as you can see in this photograph. The second thing I'd like to point out is we also have section loss of the same handrail due to corrosion. Those areas are shown with white arrows where you can see that there's notable difference in the thickness of metal in comparison to the adjacent side of those handrails.

Aluminum also has the corrosion process, which is through oxidation. This results in a white powdery staining and formations. Given the uncoated color of aluminum, this can often be difficult to see unless you have close range access. This oxidation can cause pitting and can also lead to the loss of metal over time. The aluminum handrail shown in this photograph has unique corrosion occurring as it is located within an indoor pool setting and has been constantly exposed to a high chlorine environment. And just as a comparison to that spotty brown handrail just to the right is a normally colored aluminum without that same exposure for the same corrosion occurring.

So let's talk about metal elements and where they would be located throughout your building and structure that may require coatings to protect the metals. The photographs here and the bulleted list is just a few examples. Metals can be as small as the angle connecting a parapet wall to a column below a coping stone, which we have shown in the top left photograph all the way to the main facade material of a building, both are critical to protect and to maintain. The integrity of the metal metal can also be found in structural elements which can be concealed or embedded within the facade assembly.

Now that we have a sense on where metals would be located, let's jump into how we would review and recognize coating condition issues. We'll give you some examples of coating related issues starting a decision path on when you should overcoat or recoat, understand that there are certain contaminants on a metal surface that could impact coating adhesion along with certain considerations to take into account if you do have a historic building. So coating related issues. The first one I have shown on here is flaking. It seems a little visually obvious where we have the coating flaking into little pieces which then exposes your metal substrate.

The second one in the middle is bubbling into bonding of the coating system itself. On the left-hand side of the photograph you can see that the coating has an uneven appearance, which is the bubbling of the coating, and to the right of that photograph, you also get to see corrosion spotting, which is the orange spots coming through the coating system. The example on the right is what we call filiform corrosion and how that it occurs is there's an unpainted end of the member corrosion forms at the end of the member and starts to work its way underneath the coating system.

We can also have fading and chalking of a coating, which a lot of us have probably seen, and that's an indication that the coating material itself is starting to break down. This middle photograph is an example of pitting of an aluminum panel. Just also to note, the center panel is about 60 years old and was anodized and has eroded over time. And then we have pitting of a handrail, which is on the right hand side, right photograph, and this was actually a handrail in its initial condition for maybe two to three months before it started to show pitting. This was exposed to our marine environment.

Here are some sneaky examples of hidden corrosion issues in concealed conditions. The one on the left shows corrosion staining, extending below a balcony bracket that had been clad in stucco. The steel is concealed, so we would have to remove the material to get a better look at where the steel is and how extensive the corrosion was. Above this balcony was a failed sealant joint which had allowed water to get behind the balcony assembly and come into contact with the structure. The sealant was intended to shed water and as such the structural member was uncoated, which is pretty typical. A potential repair here could include providing a corrosion inhibiting coating to the metal for improved protection, as well as installing a new sealant joint and potentially making that a more robust flashing system.

The middle photograph shows a corroding steel lintel above a window conditions I would notice in the field would be the visibly different mortar or sealant applied to the joints at the end of the lintel, which are pointed out with the white arrows. This is typically indicative of shallow mortar coverage, which has sped up the corrosion of the lintel. Secondly, as the lintel corrodes, this can rust jack or put pressure on adjacent materials including the mortar directly above the lintel. This can result in displacement or movement out of plane of the lintel and in this case vertical displacement at the center of the lintel where it isn't supported, which I have shown with the yellow arrow.

The photograph on the right shows spalling of cast stone as it was related to the corrosion of the steel angle. Some corrosion staining is visible at the mortar joint, but that wasn't always the case in other locations at certain locations. The corrosion also resulted in spalling of the block unit due to the expansive nature of the corrosion. The corrosion put pressure on the cast stone which led to spalling, cracking, and horizontal displacement. This is at a historic building and there may not be any coating on the angle. If there is, it would typically be a lead-based primer. Repairs at these locations include removing the cast stone, cleaning and assessing the shelf angle and coating the shelf angle in situ. If there is no section loss, if there is significant section loss, the angle will be replaced with a coated angle.

This slide is not meant to scare you. I will start with that, but it highlights the extent of corrosion that can occur with a lack of coatings or the lack of maintenance of said coatings. The photograph on the left is from a partially exposed steel beam in a foundation wall. These are metal structural elements without a protective coating and constantly exposed to a wetting and drying cycle, they're found to have significant corrosion. As I have shown in that photograph. The photograph at the top middle is a bridge which was being coated. The photograph shows the condition after removal of the original coating along with the corrosion product and the substrate shown here is after had been prepared with an abrasive blast after surface preparation, operations, section loss was noted in the web of this beam. The extent of section loss is to be documented as it will start to impact the structural capacity of that member. So in this case, structural steel retrofits were installed.

The photograph at the bottom center is a beam with section loss along the top edge that actually was a result of a roof leak. The roof leak had occurred over several years, so while maintaining the coating here would've helped protect the steel, the root cause, which really was the roof leak required repair to mitigate the water. And then lastly, we have a photograph on the right, which is a tower where copper cladding was removed to address the underlying structural steel corrosion and section loss, which I have shown with those connection plates shown with yellow arrows that was caused by the failed paint system.

So now we have recognized some coating issues. Let's discuss how to approach coating projects. So there are typically two ways to approach a coating project, which is recoat or overcoat. While the latter seems to be least disruptive and quicker, there are several things that we need to evaluate prior to proceeding with overcoating. The thing to remember is the bond and performance of the new coating will only be as good as the bond and performance of the existing coating. If there are any issues with the existing coating and potentially the substrate, these will not be addressed with overcoating to consider the potential of overcoating. We as a consultant would evaluate the existing coating by performing several test methods. Please note that most of these are destructive, meaning that we're going to be removing coating and the substrates being exposed. So the test locations, regardless of whatever coating process and project is chosen, will need to be repaired.

Also, please note that anodized aluminum and most baked on coatings cannot be evaluated with these methods. The first one I have shown on this slide is ASTM D3359, which is evaluating coating adhesion by using tape. This is a qualitative method which rates the adhesion on a numerical, numerical and alpha scale with zero A being the worst up to five A, which is the best performing best adhesion. The current version of this ASTM standard provides a helpful visual along with a narrative description for the evaluation ratings, and that's what I have shown on the right hand side is that visual guide method A is what you see in the photograph. And to do that, we perform a cut, an X cut in the coating all the way down to the substrate. The X has to be a certain size cut at a certain degree. We then apply pressure sensitive tape and pull it off. This test method, ASTM D3359, is pretty user-friendly, easy to understand if you're willing and interested in reading through the ASTM standard and trying it out yourself.

Another one will be ASTM D4541, which actually obtains coating pull-off strength. There is circular location shown in this photograph and that's where we've applied the pucks to perform that testing. It's a way for us to measure coating adhesion by using the small pucks or dollies that are epoxy to the coating surface. Once the epoxy cures, we use a portable adhesion tester, which is shown the right hand photograph and we pull on the puck using a certain speed and force until it fails. This test method is quantitative as we obtain a certain PSI and failure. While the PSI is interesting for us to document, it's also important for us to know where the failure plane occurs. We'll evaluate is the failure plane at substrate to coating? Is it within the coating system such as the primer to top coat? And you'll also see us use this method to evaluate the installation of new coatings to confirm performance. The tricky part of this test is determining what the ideal PSI target should be of the existing coating. These typically are specified and agreed upon upfront and sometimes that can be difficult to obtain if you're a historic building or a building where we don't have the specifications for the original coating.

So the Society of Protective Coatings, our SSPC has a technology update which provides best practices for evaluating the potential for overcoating. Really quick, I do want to acknowledge that SSPC has combined with the National Association of Corrosion Engineers, or NACE, to form the Association for Materials Protection and Performance, also known as AMP. So if you hear us say AMP further in the presentation, that is the combination of SSPC and NACE. So the technology update, TU-3, covers a visual assessment along with testing to evaluate the potential for overcoating. Two of the methods we have already discussed the tape test and the pull off. And then we take this information with the TU-3 and it starts to create a path for overcoating would be low risk in comparison to a higher risk. The TU provides this table, which I have shown on this slide to plot that path. It takes into account the test results along with the coating thickness. The other ASTM method shown on this table, D6677, is evaluating adhesion by knife along with our results from the X cut method. Just remember five A is no loss of coating even if we had trace removal or up to one 16th loss along the edges we're in the clear with over coating according to this table, once we get lower than three A meaning more coating loss during these tests, we introduced more risk for overcoating.

So then I took table one from TU three and added the visual assessment component where we're looking at the amount of corrosion on the surface area when looking to overcoat. And I came up with this table where once we start getting beyond 15% of the surface area for preparation, the TU indicates that it's almost just as much money to overcoat and prepare than for full removal and preparation. So keep that in mind. The risk for overcoating includes the delamination of the coating. This occurs due to the internal stresses of the new coating that's put on the existing coating to the typical coating shrinkage and curing process. We can also still experience rust back and just overall poor performance.

We also need to do testing of the metal substrate to ensure that there are no contaminants that will impact coating adhesion. Common tests that we would perform include the identification of chlorides, sulfates and nitrates. The impact of those with coating performance are shown in these two photographs. We would also want to look if there's any remnant oils or waxes, which can come on new metal members from shops. And so we want to make sure those are addressed and removed prior to the installation of any coating. The other thing we need to evaluate are sealant impacts. So silicone sealants have great performance but can actually cause plasticizer migration and can contaminate adjacent substrates and impact adhesion of coatings. We can perform a water break test in the field or complete a solvent weight of the substrate in the field for lab analysis to identify if there are any organic or inorganic surface contaminants. We can address plasticizer mitigation or migration on metals by using a silicone digester to remove the silicone contamination, but we need to make sure we do our due diligence to identify any contaminants as your coating will not bond if there is that plasticizer or migration. Please also note that coatings with the exception of silicone-based coatings will not adhere to silicone sealant. If you want a facade to have a uniform color consideration, may need to be given to replacing sealant joints as part of the coating work.

So what if you're building is historic and I'll do lowercase h. It could be historic but maybe not necessarily listed. We want to coordinate the coating selection with the known history of coatings. And as a building owner or manager, this is something we talked to you about what your intent is. We'd want to make sure we understood the color, historic color, the sheen texture patterns. Oftentimes this is difficult for anyone to really look at through black and white photographs, but we want to try and understand the substrate and potential hitting conditions. And we also want to recognize that the coating may not be easy to remove. This is where trial repairs would be very handy for the coating removal process. Also, making sure that we're not being too aggressive with the coating removal that could be an adverse impact to the texture and pattern of the metal.

And we can actually take a material sample as I have shown on the bottom photograph, which is a color stratigraphy where we take a paint sample down to the substrate mounted in epoxy and then we can actually make it smooth and look at it under the microscope. This will help identify the number of layers, the color of the layers, and just provide some good information on the history of the coating campaigns. Also note that any existing building prior to 1978 ish could contain hazardous materials in your coating. And I have ish because while it was outlined in 1978, sometimes those coating projects were still out there and used until it was no longer made. And with that, I will turn it over to Joe.

Joe Buccini

Thanks, Becky. So after we understand what condition our coating is in and that we've decided to undertake a coating project, how do we move forward? First, we need to review and understand what types of coatings are on the market and which is the best choice for our project. Included on the slide are some of the most common types of field applied coatings for metal substrates that we at WJE consult and assist in specifying. As outlined in the introduction, its presentation is focused on the field applied architectural coatings. However, many of these coatings can also be applied in the shop or factory and get delivered to site already coated. As Becky had mentioned, one of the most common types of coatings are acrylics. These tend to be affordable and quick drying. They also tend to have a shorter lifespan and other coatings and are not as durable in harsh environments such as long coast lines or in areas with high UV exposures. Alkyds, sometimes referred to as enamels, have great adhesion and typically have a glossy or shiny finish. They tend to be slow to cure and have poor UV resistance. So using these on interior surfaces is recommended. Urethanes are great for industrial or heavy duty applications due to their durability and flexibility. And aliphatic urethanes in particular have good UV resistance and can be used in exterior applications. But aromatic urethane will tend to yellow over time with UV exposure. So again, a good place to use them on the interior of buildings.

Epoxies tend to be the workhorses of the coating world, especially where durability and longevity is of the utmost importance, but they are highly sensitive to UV light and susceptible to yellowing. And finally, fluoro polymers are typically your high performance organic coatings and they're typically applied to things like metal panels, doors, windows, and FEVE, or fluoroethylene vinyl ether. These are typically applied in very thin passes, in thousandths of an inch. This makes substrate preparation, which Kelly will talk about in the next section, very important. These coatings can be expensive, but they typically last a very long time.

So note that many of these coatings types can be combined. Designers and manufacturers may use epoxies as primers or base coats for the durability and something like an aliphatic urethane or a fluoro polymer as a top coat. These combinations provide that real durability of the epoxy with the UV stability and durability of the aliphatic urethane or fluoro polymer. These two images on screen are actually combinations of, on the left is an epoxy base coat with a fluoro polymer top coat, and on the right is an epoxy base coat with an aliphatic urethane top coat. So one important factor when selecting a coating is understanding the substrate or the existing coating system like Becky was talking about, since the new coatings may have adverse reactions to the existing material. One example of many is the application of an alkyd or enamel over a galvanized steel substrate. This can result in saponification, where the zinc of the galvanizing will react with the alkyd, resulting in a film forming between the metal and the coating. As you can imagine and see and is apparent in the images on the slide, this weakens the bond and causes the coating to become unadhered and to delaminate over time.

We felt it was worth noting that there are numerous less common specialty coatings available on the market, such as sacrificial coatings, anti graffiti coatings, intumescent paints, and many others. These are typically used for specific purpose or project condition. We'll not get into the details about them during this presentation, but just be aware that they exist and they exist to solve very specific problems. So performance of coatings, understanding the performance goals for the project is an important factor in coating selection and in our experience, one of the most important performance characteristic for owners and designers is the service life of the system. AMP has a published article that includes a fairly comprehensive expected service life for various coatings with different surface preparations similar to AMP. In 2020, the American Architectural Manufacturers Association and IGMA, the Insulating Glass Manufacturers Alliance, officially combined into one organization, which was the FGIA or Fenestration and Glazing Industry Alliance.

The FGIA provides voluntary specifications and test batteries that categorize these architectural coatings into three general buckets based on their performance metrics. These documents used to be provided by AAMA as AAMA 2603, 2604, and 2605. But while AAMA no longer exists as an organization, these documents provided by FGIA are still called AAMA 2603, 2604, and 2605 as they've been used in the industry for a very long time. We typically recommend coatings included in AAMA 2603 for interior use only as the test battery and result limits are less stringent and some tests are actually just absent from the testing procedures altogether. We typically recommend coatings complying with AAMA 2605 for high performance exterior applications such as on facades or other areas that you really don't want to have to recoat within the next 10 to 20 years. However, this does not mean that no maintenance of the coating is required in many cases to file a warranty claim, documentation of a cleaning plan, sometimes proof of cleaning is actually required to file that claim. An important note is while AAMA 2604 and 2605 tests are performed to five and 10 year durations respectively, as noted in the chart, we typically see many of these coatings exceeding those durations and have a longer service life when properly maintained. Like I said, fluoro polymers meeting AAMA 2605, for example, can last upwards of 20 to 30 years if properly maintained prior to recoating needs.

So when we're discussing the various common coating types, we've briefly discussed some of the pros and the cons of each, but there are many properties of each specific coating that are important to know. Understanding the desired durability such as chemical resistance, corrosion resistance, and UV stability are important. But cost appearance and application style can be equally important when deciding on what coating type is right for your project. There is not one coating that will work for all applications. And even if you are familiar with a particular coating type or coating product, we highly recommend contacting your coating designer. Reviewing the coating manufacturer's technical literature, we're discussing the details with the coating manufacturers representatives as products, chemistries and techniques may be updated periodically. So something that was installed 10 years ago may have the same name but may be chemically different. Having these conversations early about specific products and your expectations can help to solve problems before they become costly change orders.

So disruption in coating application just as selecting the coating product is important and knowing how disruptive the coating application will be is also extremely important since this will impact staging work hours, cost and a myriad of other factors. Most coatings have an odor of some sort and some are more objectionable than others. These coatings' odors often dissipate after the curing process has completed, but they can bother tenants who are sensitive to smell, be aware of intake vents and exhaust louvers on buildings. These can suck odors from the coating into the building interior or cause particles from the coating application to become airborne and travel to places where they really shouldn't be. In places like hospital campuses where you may not have off hours per se, coating systems like epoxies that traditionally have a strong smell may not be desired even if the performance of that coating is exactly what the project needs and is looking for.

The application of a coating itself is typically not a noisy endeavor, but surface preparation that involves abrading the substrate can be very disruptive, especially if the substrate is on a portion of the building structure or attached to the building structure that can translate noise and vibration long distances. We'll discuss types of access later in the presentation, but it can also cause disruption and impact tenant or user experience throughout the duration of the project. And finally, containment is sometimes necessary at locations to receive coating work. Containment can refer to an enclosure around work areas. For example, you may have containment to stop blast media from surface preparation from escaping the work area as is shown in the image on the left, there's that gentleman is in a plastic tent while performing that abrasive blasting containment can limit tenant views through windows or access to whole portions of the building exterior.

So discussions with stakeholders are recommended prior to the construction of that containment and additional limitations for coatings. Disruptions are one set of limitations for a coating project, but there can be others as well. When deciding between coatings, be mindful that the level of surface preparation will directly influence the performance of your new coating and an area that is difficult to access may result in suboptimal surface preparation. It's also important to note that the required surface preparation level for coating types being applied SSPC as Becky was talking about earlier, provides guidance on the surface preparation levels or SP levels, which Kelly will discuss in the next section. The photo above shows a metal panel with peaks and valleys and reveals. And so if a surface preparation level using a grinding wheel was required for the coating that was selected, you may have a lot of difficulty getting that wheel into all of those little nooks and crannies which could impact the coating longevity.

As Becky discussed, contaminants need to be considered such as sulfates, nitrates, and chlorides. And depending on the use of the building or structure, other contaminants may need to be considered as well. If contaminants are not fully removed, it can affect the long-term coating performance. Removing material that impedes coating bond to the metal is of the utmost importance and it seems straightforward, but a clean substrate makes a happy coating. And finally, environmental considerations are important to track and control if possible during the curing and application of the coating. However, the environmental conditions can also impact the selection of coatings. You wouldn't want to apply a coating that's extremely sensitive to humidity in a place like Florida. A real world example of this is what's called an amine blush that occurs when with some epoxy coatings when they cure in high humidity. A film forms on the surface of the coating which appears hazy and can have a sticky surface and ultimately affects the bond of any subsequent coatings.

And kind of bringing us home here, the important details for coating design. Successful coating project includes more than just selecting the appropriate coating and knowing your substrate material. Most substrates contain imperfections inside outside corners, welds and other surface irregularities may also require special detailing if identified ahead of time. Some surface irregularities may be able to be filled or smoothed out prior to the coating application and be aware that due to the relative thickness of metal coatings, they're not very thick. They typically do not hide surface surface imperfections very well. And depending on the color and sheen, they may make these surface imperfections look worse or more pronounced. Tricky geometries could require multiple types of surface preparation if one is not sufficient to get to all of the areas inside corners in particular or reveals may require a contractor to hand apply with a brush or spray a stripe coat of the primer or base coating before application of the field membrane in order to ensure the thickness is achieved. Also welds, as you can see in the photo on the right here, welds are not always perfect. They can have holes or voids that the coating will not fill in. Sometimes poor welds or voids can be filled in or epoxy added or the weld actually redone to provide a continuous substrate for your coating.

Tricky geometries should not be underestimated, shown you these images. There are many different types of acute angles and components like nuts or bolts or washers and plates that can make a coating applicator and specifier's life. Very interesting. And again, detailing requirements for coatings are often included on the drawings or in a technical specification for your coating project. Good specifications go beyond what's just included in the manufacturer's standard installation instructions and should be tailored to your specific project. Good specification should include procedures that will help quality control efforts during and after application. For example, specifying the use of a different color or shade of primer base coat and top coat can really help to differentiate thicknesses and various layers as well as make it visibly apparent which coats of the material have been applied and which have not. The image on the left here is a beam that has surface preparation starting from right to left and the final coating is on the left. But you can see each and every step of the process and going out to a building or out to your project site, it's really easy then to decide, okay, I know exactly where my project is in its duration.

And then clear indications of your coating scope are also important to communicate to the design and application teams. Knowing where your coating should be and where your coating shouldn't be are equally important. So once you have your coating selected and you're design dialed in, you're ready for preparation and installation with Kelly.

Kelly Cronin

Thanks, Joe. As Joe just discussed, we've designed the coating system and select the products. So now let's discuss preparation and installation of the coating. There are several ways the existing coating can be removed. You should choose the preparation method that goes with the coating materials you have selected. Regardless of which option is selected, you must remove grease, oil, dirt, and other contaminants that might impair bond of the coating in accordance with surface prep or SP one, which is for solvent wipe. We recommend you do this first, otherwise you risk spreading those contaminants. If you're proceeding with over coating, most often you'll be in the hand and power tool realm. SP two is hand tool clean. The remaining reference SP numbers include power tools with the difference being level of cleanliness. Cleanliness is not just dirt. It also refers to existing coating, staining, corrosion, et cetera.

Note that the numbers used for levels of surface prep are not linear. For example, SP 15, which is commercial grade power tool cleaning is not a greater degree of surface prep than SP 10, which is near white metal blast. These methods may be limited in preparing the surface profile, and we have seen where the power tool cleaning has actually smoothed out or buffed the metal substrate resulting in no profile, which as you can imagine, results in minimal to no coating bond. Abrasive blasting uses abrasive media, often called sandblasting, but that term is not fully accurate as the blasting media is often not sand. Other medias can be based on hardness measured in Mohs needed for your particular substrate. The softer metals such as aluminum and copper alloys should not be abrasively blasted with a media that has a high Mohs value that would damage the substrate.

SP 16 is asterisk on this slide as it specifically applies to galvanized steel and non-ferrous metals. This recognizes that abrasive blasting methods and other standards may be too harsh, but these types of softer metal substrates, and I do have a chart on this slide with a range of Mohs values for common metal substrates that we see. The evaluation of the appropriate media should be done by performing trial repairs. The most common blasting media we have seen is typically steel shot or garnet, which is high on the Mohs scale. Other medias can include baking soda, aluminum oxide, glass beads, garnet, walnut shells, and even dry ice.

Chemical strippers can also be used, but this process is a lot slower and will only remove the coating. It will not remove corrosion or other contaminants related to required surface preparation levels. It will also not change the existing surface profile. The latter may be desirable based on what currently exists and how the profile affects the aesthetic result. For example, high surface profile reserves in greater texture, but it also uses more coating product. Even if chemical strippers are the primary coating removal process, it is often paired with another preparation approach such as hand or power tools. Chemical strippers may be beneficial if there are hazardous materials that need to be removed. Joe spoke earlier about some environmental considerations and coating limitations. When selecting coating systems, the environment has a big impact on application of the coating. Most coatings are temperature dependent. While there are coatings formulated to be applied in low or high temperatures, typical coating materials are often designed to be applied around 75 to 77 degrees Fahrenheit and 50% humidity and are recommended to not be applied when the surface temperature is less than 50 degrees Fahrenheit or more than 135 degrees Fahrenheit with some variation depending on the specific product.

Keep in mind that metal is highly conductive, so in indirect sunlight, the surface of the metal may be much higher than the ambient temperature. Temperature is also tied to dewpoint and frost that create moisture on the surface to be coated. Coating application in dry locations like Phoenix, Arizona will differ from coating application in humid locations like Honolulu, Hawaii, or Florida like Joe was speaking about previously. Rain and other precipitation can impact the coating substrate before the coating is even applied. All substrates should be clean of not only oils, waxes, et cetera, but should be dry. Precipitation can also impact the coating after application because the coating can be damaged if it's not set up before the precipitation. Wind should be considered during coating application as well. If you are spray applying a coating, particles of the coating will become airborne and can travel onto adjacent assemblies. They can also fall on cars, furniture, people, and other objects beneath the work area. Protecting substrates that are not intended to be coated is important. Containment may be needed during the coating application.

How you apply the coating has a big impact on the final appearance of the coating. Spraying the coating often is the quickest and most effective way to apply the coating to a large area. Rollers can also be used for large areas. Brushes are typically used for detailing and small areas where spraying and rolling cannot reach. The application approach can affect the finish appearance typically with texture such as roller texture based on the nap size and the direction of the brush strokes. Some of this can be managed through specifying limits on nap size and the material. Also note that the size of the area that can be coated at one time will be impacted by how it is applied. For example, the length of the applicator's arm. In addition, there are some coatings that have reflective particles in them which will lay differently and thus reflect light differently depending on how and what direction the coating was applied.

Accessing the facade of the building to apply the coating will vary based on the height of the building, rooftop conditions, surrounding conditions, and other factors. Access will impact the amount of area that can be coated at one time. Swing stages will limit the areas to those directly in front of the stage on that particular drop. While scaffolding may allow for work at multiple areas at the same time, remember that coatings will appear different from a distance versus close range in the sun, in the shade at an angle versus straight on if the coating area needs to be contained. This will impact how the building is staged as well. It is possible to have a good quality coating. Having a project specific specification written by a design professional, knowledgeable with coatings, will create a baseline for what is expected for product selection and installation. Specs can also limit sags, laps, and other undesirable aesthetic effects on coatings.

Similarly, having a qualified contractor complete the coating work will make a huge difference. Not all projects require a certified coating installer, but for those that do, AMP does provide certifications for both installers and inspectors. It hasn't been stressed enough. Surface preparation is critical to long-term coating adhesion. The surface profile should be reviewed prior to coating application. In addition to reviewing the surface preparation, there are multiple QA QC tasks that can be completed before, during, and after coating application. This includes checking the thickness of the coating, either wet mill thickness when the coating is applied, dry mill thickness after the coating is applied, or a combination of both after application adhesion testing can be completed for the coating. The best way to ensure a good quality coating is by completing a mockup prior to full scale application. In addition to reviewing the appearance of the coating, these mockups should establish the inspected quality of the coating application that the contractor will be held accountable to for the duration of the project. At the mockup surface preparation, coating, application coating thickness and adhesion can all be reviewed with the full project team. The coating color finish and overall look can be reviewed as well. We highly recommend the coating manufacturer's technical representative be present during the mockup to observe and approve the application.

So in summary, the keys to a successful coating project. First assess and evaluate the existing coating. This will help determine if you can recoat or overcoat. Remember, know your coating, know your substrate. Second design and select the new coating. Not all coatings are created equal. Understand your selected coatings limitations and expected performance. Don't underestimate the importance of proper detailing and good specifications. And finally, prepare and install the coating per the design documents and manufacturer's recommendations. Surface preparation and environmental controls are critical. Also, do not skip on the mockups. Turning it over to you, Liz.

Liz Pimper

Alright, thank you Joe. Thank you Kelly and Becky. Alright, let's take our first question. Where do elastomeric coatings apply in that list of available material types? So this person is referring to a specific slide, hopefully you know which one,

Kelly Cronin

So I can take this question. This is actually on a slide that Joe talked about. Generally when we talk about elastomeric coatings, we're talking about coatings that have elastic properties and those typically get applied to concrete or masonry substrates. We usually don't apply elastomeric coatings to metal substrates. A lot of elastomeric coatings also have porosity, and we want that when we have a porous substrate like concrete or masonry. But since metals aren't porous, we don't need those properties of the elastomeric coatings.

Liz Pimper

Okay. Our next question, is there a coating that is used to separate dissimilar materials to prevent them from coming in contact? For example, maybe stainless steel and galvanized or zinc coated steel in contact with each other?

Joe Buccini

This is a great question. I would love to answer this one. I deal with this on a regular basis with many of my projects. So yes, separating dissimilar metals is highly important. And one of the kind of standard coatings that we see is a zinc rich coating or a zinc rich primer, which is it has zinc in it and it's a thick coating. You put it on, it's not pretty. It's not something that you're going to want to look at. But that is the kind of gold standard in my book for a coating being applied to separate to similar metals. I also see things like self adhering, flashings, asphaltic or shims of polystyrene being used if needed.

Becky Wong

And if I can also add epoxy could be a good option. It really depends on where your dissimilar metals are coming into contact. Is it concealed? Is it exposed? Sealants can also be used beautiful sealants. Just there's a lot of options. But yes, and it depends on where it is and if you're trying to keep it hidden or not.

Liz Pimper

Okay. Our next question. How do I know where on my project I need to perform mockups?

Becky Wong

I'll take that one. Typically for mockups, what we like to do is find a place that is the most conspicuous. So something that's not right next to your front facade, but we also want to make sure that we're targeting the conditions that need to be addressed during the coating project. So this is where we'd work with you as a building owner or manager, talk about the conditions we need to evaluate, adjust things. We want to try a striped coating mockup like Joe showed with that beam where we see the different layers of coatings, they're visually different color-wise. Try and tuck it away from public entrances or the ventilation and it may require a couple locations and they're typically going to be fairly large. So we have the material space. You don't want it too small because you may not capture the conditions. We also want to talk about targeting detailing, like Joe was showing interfaces with adjacent materials. There's a whole bunch that goes into it, but that's kind of what my thought process is typically part of that.

Liz Pimper

Okay. Here's an easy question. Did you say walnut shells?

Kelly Cronin

I did say walnut shells Walnuts can actually be used for abrasive blasting. Walnut shells are hard enough that they can take off the coating, but they're really great for those softer metals that have a low Mohs hardness because they don't damage the substrate. So yes, I did say walnut shells.

Liz Pimper

Okay. Are coating selection and durability limited by VOC regulations?

Joe Buccini

I can take this. Yes, they are. Especially in places like California, which has higher or more stringent VOC requirements, especially if any part of the coating is going to be interior as well as exterior. So you may have different VOC requirements depending on where you're applying that coating. So excellent question.

Liz Pimper

Okay, our next question, which of the coatings should be applied using an electrostatically charged installation to save on labor preparation?

Joe Buccini

So electrostatic charged installations are typically done mostly in shop applications because you electrostatically deposit the powder, which then gets put into an oven and baked. So most typically you don't have that in a field installed or in situ situation. But fluoro polymers are one of the main coating types that are electrostatically deposited and baked.

Liz Pimper

Okay. Next question, silicone coating. And is silicone coating acceptable on metal roofing panels?

Kelly Cronin

So I will take this one. So we didn't talk about it much in this presentation, but there are silicone coatings, there are specialty silicone roof coatings that are meant for a little bit more hydrostatic pressure. So we didn't get into this presentation and I'm happy to answer your questions furthermore. But yes, you can put a silicone over metal roof panels. We would just need to see where those panels are located and what the thermal implications of that are.

Liz Pimper

Okay. This next question is adding on to one of the responses that you had to an earlier question, is it necessary to separate dissimilar metals that are embedded within concrete?

Joe Buccini

I think I can take that one. Typically, I would say yes, you do have a risk of having some kind of electrolyte, which is needed for a galvanic corrosion to occur, even if it's within a concrete structure, especially if it's a new build and the concrete is still curing and is still wet. To be on the safe side, I would personally recommend separating those metals even if they're within the concrete. But you also have to consider coating the metals to separate them from the concrete itself.

Liz Pimper

Okay. Take another question. What would be the best approach to address isolated flaking of a powder coated aluminum railing system?

Joe Buccini

So if you guys don't mind, I'll take that one. Powder coating is an application style. There are many different types of coating chemistries that can be powder coated, but typically when we hear the word powder coating, we hear and refer to fluoro polymers. So you can use things like fevs or that we were talking about as a field applied touchup paint. A lot of times for a PVDF coating that comes baked on to a railing system and you get a scratch or a dent or you need to buff something out or there's an imperfection, you can apply the FEVE coating with an artist brush or with a spray. That's how I would approach that.

Liz Pimper

Okay. Another question. We often run into standing seam roofs that have been mechanically seam that need recoating. Since the coating ends up in the seams, what is the best approach to recoating this application?

Kelly Cronin

So I will take that one. I actually just recently worked on a project where we recoated a standing seam roof. And typically with in situ roofing systems, you could I guess take the standing seams off and coat them offsite or in the shop. But usually what we see is we'll see the standing seam system remain in place and that we will have to go through the procedure that we talked about here. We want to see if the existing coating is well adhered to see if we can overcoat it or recoat it. And if we do decide to overcoat it, we'll want to make sure that also, we talked about that at those standing seams, we might need to use a brush and do a detailed strip on the standing seams before we actually apply the coating over the full standing seam system.

Becky Wong

And if I can add, it's kind of a good segue into that. You're not always just using one surface preparation method, especially for those tricky things. You might do an initial blast, which you have areas where you're going to have to use a hand or power tool clean because we're showing some of those geometries are not conductive for us to have a spray nozzle in there. So that could be another way to treat those little intricacies.

Kelly Cronin

And I will also say too, we talked about doing power tool and hand tool cleaning and dry abrasive blasting. We didn't get into it, but I just want you to be aware that there are other surface prep methods such as water jetting and there's three, or sorry, four standards from SSPC for that, it's WJ one through four and then there's also wet abrasive blasting, which I think statistically is less than 5% I think in the industry because you have to contain all the water and you need special equipment and the equipment always gets jumped up. But those are options as well, and I have seen them used.

Liz Pimper

Okay. I've got time for one more question. How do you avoid contact between dissimilar metal, which are fastened together?

Joe Buccini

Another good question, if I can take this one. A lot of times the fastening together of metals, if you have two kind of flat planes of dissimilar metals, that is a lot more highly reactive and the galvanic action will take place faster. But if you have a stainless steel fastener going into an aluminum extrusion or an aluminum shape, sometimes you have less potential for galvanic action or the way the galvanic action, the anode and cathode are reacting. You would have, let's say the stainless steel is so much smaller, but it's trying to strip away electrons from the larger piece of aluminum. You won't have as much or noticeable corrosion or oxidation of that aluminum because of the relative mass and volume of the metals. So a lot of times the fastening, along with proper selection of materials doesn't cause as much of an issue with the corrosion.

Liz Pimper

Okay. Well thank you Joe, and thanks Becky and Kelly for the great presentation. That is all the time that we have for questions today. Thank you so much for joining us. We hope it's been educational. So again, thank you so much for your time and we hope you have a great rest of the day.

This is a transcript of a live webinar and is being provided for convenience only. The transcript may contain inaccuracies, misrepresentations, and/or errors. It is provided as-is without any warranties, guarantees, and/or representations of any nature whatsoever regarding the correctness, compatibility, accuracy, and/or completeness of any information contained herein. This webinar and the accompanying transcript are intended for educational and informational purposes only. The content is not intended to be a substitute for professional advice and should not be relied upon as such. WJE disclaims all liability for any direct, indirect, or other damages arising from the use of the information contained within this webinar and accompanying transcript. All rights to any images or other copyrighted material used in the webinar and accompanying transcript belong to their respective copyright holders.